Dill Oregano Dry-Rubbed Rack Of Lamb

This Labor Day weekend we decided to get a rack of lamb for a special dinner.  We were planning on salmon, but when we went shopping it all was farm-raised and looked a little ragged.  I couldn’t remember the last time we did a rack of lamb (have we ever?!), but decided I was up for the challenge.  This recipe was so fantastically simple, I hope you all give it a shot sometime soon.  Tender, juicy, and flavorful––I will put this back on the menu sooner than later.

Dill Oregano Dry-Rubbed Rack of Lamb

  • 1/8 tsp lemon zest
  • 1/8 tsp sea salt
  • 1/8 tsp black pepper
  • 1/4 tsp garlic powder
  • 1/2 tsp dill
  • 1/2 tsp oregano
Process:
Let rack of lamb rest on counter to come to room temperature.

Combine all ingredients into your mortar and pestle and grind to a medium-fine consistency.

Rub this herb mix onto the entirety of the rack of lamb.  Preheat oven to 450ºF while the rub rests on the lamb.

Once the oven is preheated, place lamb in the oven (fat side up) for 8 minutes.  The top should be slightly browned at this point.  Then, lower the oven temperature to 350ºF and cook for approximately 20 minutes.  Keep an eye on the lamb’s internal temperature using a meat thermometer, and adjust the time to suit your preferences: an internal temperature of 120ºF will result in a rare cooking and 140ºF medium.  We took the lamb out after 21 minutes with an internal temperature of 130ºF, which was medium rare.

After removing the lamb from the oven, allow the meat to rest on a plate or serving platter for approximately 5 minutes tented with tin foil. Serve with a side or two of veggies. We enjoyed steamed broccoli and cauliflower with it.

Take a moment and let us know what you thought of the recipe, or reach out to us on facebook or twitter.  Also, we’ve added an email subscription on the right-hand column if you’d like new recipes to come straight to your inbox.

Bacon & Sweet Potato Jalapeño Boats

This was an experiment that Heather and I have been tossing up back and forth for about two weeks now.  We weren’t sure exactly how to execute it, but we finally pulled the trigger yesterday morning when we decided we were going to attend our first meat-up hosted by Stacy and Matt, of Paleo Parents fame.  We have lived in this area for some time and always had or found an excuse to not go, but it was absolutely amazing!  We also spent some time chatting with The Domestic Man.  Both of these blogs are great resources, if you’re not already aware of them.
If you are in the Northern Virginia area, I highly suggest you attend. If not, try to get together with friends monthly–the positive reinforcement and social gathering is very powerful.


Ok, enough preaching.  We threw these together for the gathering, and while I’m not sure they were perfect, I was pretty happy with the outcome.  The idea started as another “bacon-wrapped jalapeño” fill-in-the-blank, but then grew into a twice-baked sweet potato fantasy.  Here’s what you’ll need to make your own:

  • 2 large sweet potatoes
  • 6 strips Whole30 friendly bacon
  • 10 jalapeños, halved and cleaned
  • 1/2 tsp salt
  • 1/2 tsp pepper
  • smoked paprika (for sprinkling)

 Preparation:

1.  Chop bacon into small chunks, peel (and shred) sweet potatoes, and halve and deseed jalapeños.
2.  Sautee bacon over medium heat to soften (no more than 2 minutes) and then add shredded sweet potato.
3.  Cook for 5 minutes, stirring regularly.
4.  Once cooked through, allow to cool and then place into blender or large bowl to mash.  Add salt and pepper.  At this point, preheat oven to 375ºF.
5.  With a spoon/spatula, fill jalapeño shells with mashed bacon and sweet potato mixture.
6.  Bake for 10-12 minutes.
7.  Remove and sprinkle with roasted paprika.
These were very hot, I think in large part due to the fact that Whole Foods only had gigantic jalapeños. Smaller sized peppers would definitely help.  Also try this mixture in mushroom caps or non-spicy peppers.  It is a great flavor finger food that’s also pretty filling.  We hope you enjoy!

Indian Spiced Whole Roast Chicken

This chicken was absolutely the most moist and tender roast chicken Brent or I have ever made. We were in complete awe of our success. The complex flavors and strong aromas had us smiling and drooling for days. It actually took us two days to make it, because our efforts were very much trial and error. But it was worth it. You must try this!


Indian Spiced Whole Roast Chicken
Ingredients

  • 1 whole, 4-pound chicken
  • 7 cloves garlic, separated into 4 cloves pressed and 3 cloves pressed
  • 3/8 teaspoon freshly grated ginger, separated into 1/4 teaspoon and 1/8 teaspoon 
  • 3 and 1/2 teaspoons graham marsala, separated into 1 and 1/2 teaspoons and 2 teaspoons
  • 1 teaspoon ground hot chili
  • 1 teaspoon salt
  • 1 tablespoon fresh lemon juice
  • 1/3 teaspoon powdered tarragon
  • 1 large onion, diced
  • 4 tablespoons ghee (or coconut oil or olive oil)
  • 6 cloves
  • 8 black peppercorns
  • 4 cardamom pods, cracked
  • 1 cinnamon stick
  • 2 cups chicken broth, separated evenly
  • 2 tablespoons of water
  • chopped fresh cilantro, for garnish
Method

*Note: This is a low and slow recipe. Plan to have it cooking all day.

1. Rinse the chicken inside and out, and pat it dry with paper towels or a cloth.

2. Make a paste by combining the following:

  • 4 cloves garlic, pressed
  • 1/8 teaspoon ginger, grated
  • 1 and 1/2 teaspoon garam masala
  • 1 teaspoon ground chili
  • 1 teaspoon salt
  • 1 tablespoon lemon juice

3. Rub the inside cavity of the chicken and the entire outside of the chicken with the paste.

4. Place the whole chicken in your large baking/roasting dish, cover, and allow it to marinate for 2 to 3 hours.

5. Preheat the oven to 250 degrees F.

6. Heat the ghee in a skillet over medium-high.

7. Add the onion, 3 remaining cloves of garlic (pressed), and remaining 1/4 tsp of ginger (grated) and cook until the onion is browned.

8. Add the cloves, black peppercorns, cracked cardamom pods, cinnamon stick and 1 cup of the chicken broth to the skillet mixture. Simmer for about 2 minutes, until fragrant and well blended into a baste.

9. Spread the baste over the chicken, cover and cook in the oven for at least 90 minutes, basting every 15 minutes or so with the pan juices, or until the internal temperature of the chicken reaches somewhere between 150 and 155 degrees.

10. Uncover the chicken and pour the remaining cup of chicken broth over it.

11. Turn up the oven to 410 degrees F.

12. Bake the chicken until it browns on the top and reaches an internal temperature somewhere between 160 and 165 degrees.

13. Mix the tarragon and remaining 2 teaspoons of garam masala into the 2 tablespoons of water. Then drizzle over the chicken.

14. Finish it off by sprinkling a little chopped cilantro for garnish on top.

Grill-Roasted Liver-Stuffed Peppers and Mushrooms

Last week, we made Paleo Comfort Food‘s Dirty Cauliflower “Rice”. (It was delicious! You should buy the book and make it.) Now, in making the recipe, we used all chicken livers instead of chicken giblets because we couldn’t find giblets at any store that weekend. The recipe only calls for 1/2 a pound, though, and we could only buy the livers in a 1 pound container. What were we going to do with the leftover livers? At first, we had no idea.

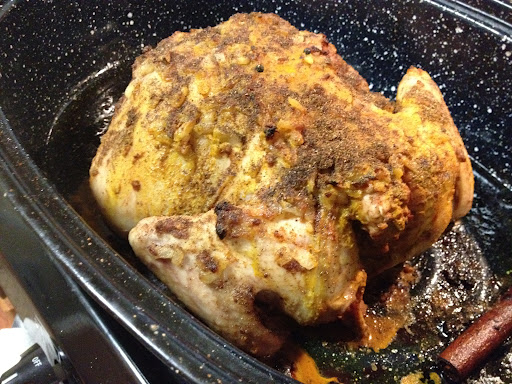
Then yesterday, with Brent’s parents visiting, we had some fun with our food (and finally found a use for those leftover livers). We grilled a whole chicken and veggies and peaches, too. But this particular recipe, which we whipped up as an appetizer, has me feeling very gourmet!

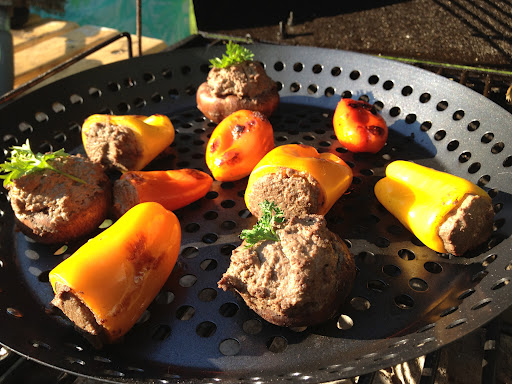
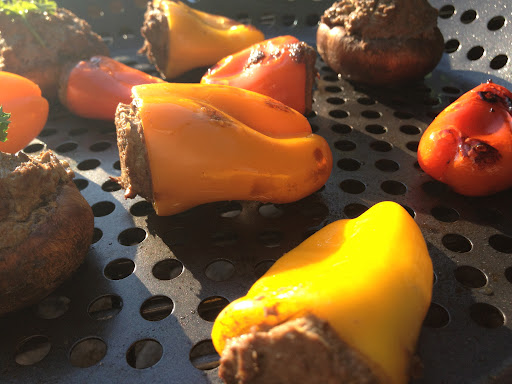
We started by making a chicken liver pâté. Then, we stuffed it into mini peppers and baby portobello mushrooms. Finally, we grill roasted them on a veggie grill plate. They were AMAZING! Check it out…


Grill-Roasted, Liver-Stuffed Peppers and Mushrooms

Ingredients

  • 4 slices of bacon (we use the sugar- and nitrate-free kind from USWellness Meats)
  • 1/2 chicken livers
  • 1/2 medium white onion
  • 4 garlic cloves
  • 1/4 tsp sea salt
  • 1/4 tsp black pepper
  • small peppers and baby Portobello mushrooms (Brent’s parents brought 7 little peppers and lots of baby portobello mushrooms, of which we used all the peppers and 3 of the mushrooms)
  • 1/4 tsp of thyme
  • 1/4 tsp of dill
  • 1/2 tsp of lemon zest
  • a drizzle of olive oil
  • parsley for garnish
Method
1. Dice the bacon slices. 
2. Coarsely chop the chicken liver.
3. Finely chop the onion. (I actually used our little Ninja!)
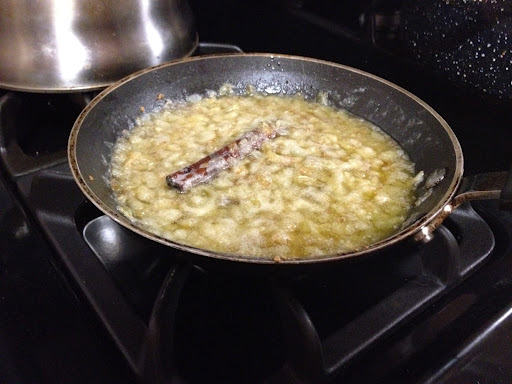
4. Pan fry the bacon pieces in a deep skillet until soft (about 1 to 2 minutes).
5. Add the onion to the skillet.
6. Immediately press three of the four garlic cloves into the bacon and onion sauté. 
7. Sauté until the onion is soft (about 2 minutes).
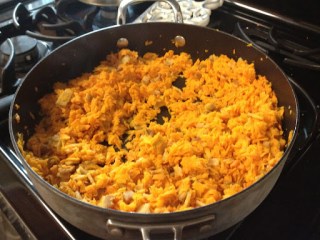
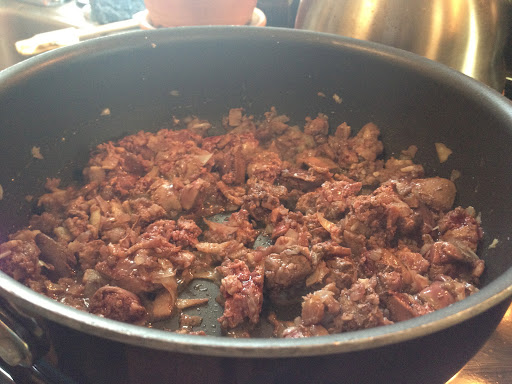
8. Add the chicken liver pieces and sprinkle the sea salt and black pepper over everything in the skillet. 

9. Sauté the mixture for 4 to 5 minutes, until the livers are nearly cooked through.

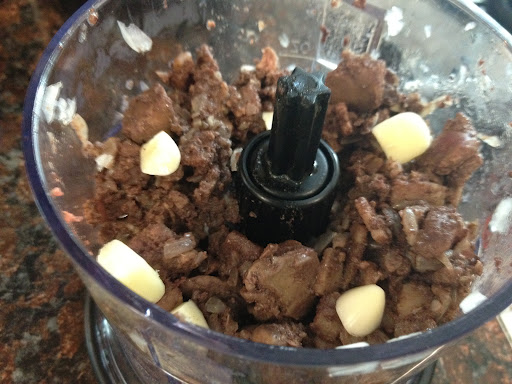
10. Remove from heat and scoop into your food processor or blender. (Here, again, I used my nifty Ninja. I love this thing. But there’s an important note to make: my Ninja still had some pieces of onion from it’s fine work dicing. This, I anticipated, would allow a very small amount of slight sharpness to carry through into the pâté.)
11. Add the fourth clove of garlic to the mixture in the food processor or blender. (Again, looking for a little extra zing in the flavor here–the combination of sautéed garlic and raw garlic should create a good depth of flavor.)
12. Blend until thick and smooth.

13. Cool the mixture. (I scooped it into a bowl, placed it in the fridge for about 15 minutes.)

14. Meanwhile, chop the dill and thyme.

15. Also, clean and prepare the mushrooms and peppers for stuffing.

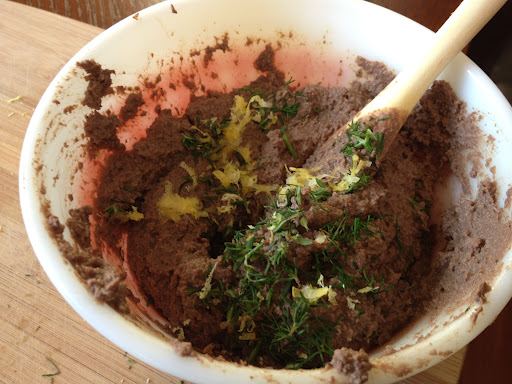
16. Fold in the thyme, dill and lemon zest.
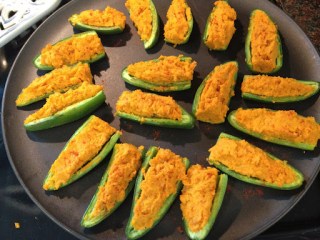
17. Stuff the mushrooms and peppers with the pâté and place on a plate. (At this point, I actually put a couple pieces of parsley as garnish on top of the mushrooms, but you don’t have to do that.)
18. Drizzle the stuffed mushrooms and peppers with olive oil.
19. Grill on a veggie grill pan: the peppers needed about 2 to 2 and 1/2 minutes per side (5 minutes total) and the mushrooms took about 10 minutes.
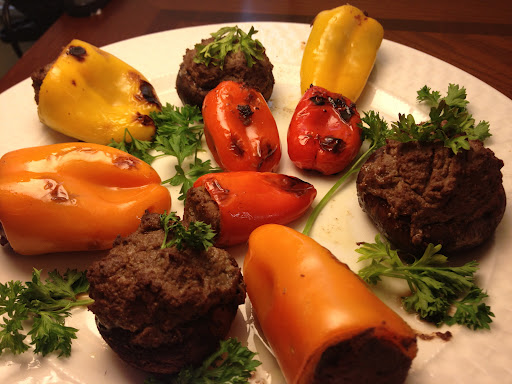
20. Plate, garnish with a few sprigs of parsley, and serve!
Personally, I never enjoyed a single recipe with chicken livers as a kid. No offense to my parents, but the livers with onions they made were gross–leathery, muddy, chewy, chalky, that bloody iron taste. Oh, and did I mention that I didn’t care for onions much as a kid either? Yea.
However, as we all know, tastes change and time can play some pretty crazy tricks on you. I was hesitant to put only chicken livers (instead of chicken giblets, which do include livers, I know) in the Paleo Comfort Food’s Dirty Cauliflower “Rice”. What other option did I have? None. So, I toughed it out and to my surprise it was delicious. Sure, I could taste that iron flavor, but it was subtle and certainly the liver was not like leather in our dirty “rice”. I’ll say it again–it was delicious!
So, although I can’t remember a single time when I’ve been willing to try pâté, here I was making a pâté in my own kitchen today. I was nervous but eager. The anticipation was thrilling; the bacon, onion, garlic and liver sauté had me drooling from the start. But would I really enjoy the taste? Or was I just excited about the bacon? Only a taste test would tell… 
AND I LOVED IT! 
The pâté itself was so savory and rich, but then coupled with the sweet little peppers and earthy mushrooms… O.M.G. Sure, the taste of iron was kind of there; it was subtle, not off-putting. Meanwhile the smooth texture, the salty bacon, savory onion and garlic, and the little hint of smokey sweet from the peppers… it just popped! 
I must say, though, I especially loved the combination of the pâté with the baby portobello mushrooms. Sure there was more juxtaposition of flavor in the pepper-pâté combo; but there was something homey and warm and comforting about the savory pâté with the earthy mushrooms. It just makes me want to settle down into a big leather arm chair in front of a glowing fire and read a Jane Austen novel. 🙂
OK. Are you seriously still reading my ramblings? That’s awesome, but I’m sure you’re getting tired of them :p so I will stop here, haha. I hope you enjoy these tasty appetizers as much as we did. They take a little time and effort, but they are so worth it.
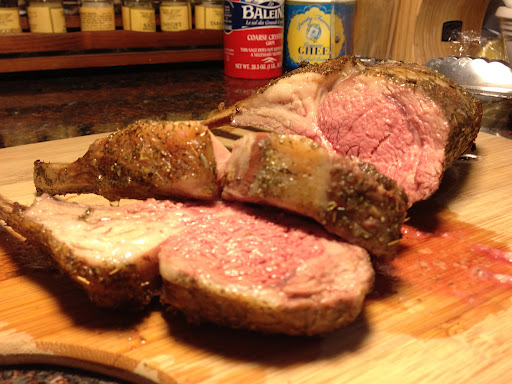
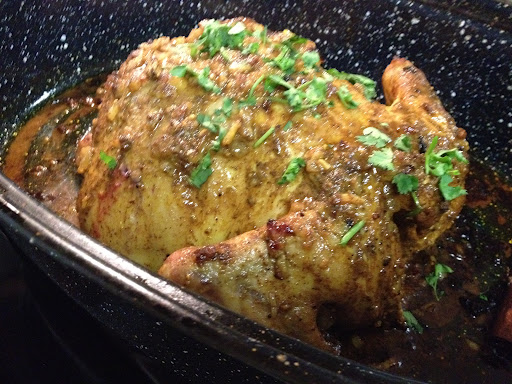
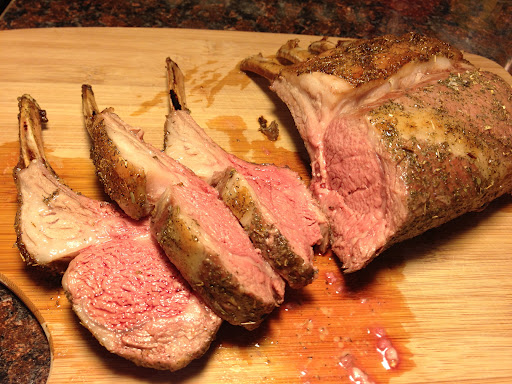
Enjoy!!!

Baby Bok Choy and Bamboo Shoots Sauté

The other night, as Brent prepared the grill and a storm was rolling in, I scoured the fridge looking for a good side dish. (We have a bad habit of leaving sides to the last minute. We always have veggies and fruits, it’s just that we don’t always make a plan on how well use them, haha.) anyways, I see our big container of baby bok choy and realize “oh no, those needs to be used.”

We also had about half a can of bamboo shoots (not in the can anymore of course, that’s gross–I had put them in plastic storage container and kept it in the fridge). I didn’t want overwhelm our buffalo steak, which Brent had simply seasoned with a light sprinkle of sea salt, with heavy Asian favors, so I didn’t pull out the coconut ions or ginger like I normally would for sautéing bok choy. Instead I grabbed a partial white onion, a couple of garlic cloves, and some coconut oil.

Here’s what I came up with, and at the end, I’ll note a couple of adjustments I wish I had done.

Baby Bok Choy-Bamboo Shoot Sauté

Ingredients

  • 4-5 cups baby bok choy, stem trimmed
  • 2 cups bamboo shoots
  • 1/3 white onion (approx. 1/4 cup), sliced
  • 2 cloves of garlic, pressed
  • 1 tablespoon coconut oil

Method

1. Heat the coconut oil over medium-high heat.
2. Sauté the garlic and onion for about 1 minute.
3. Toss in the baby bok choy and sauté for about 3 minutes.
4. Add the bamboo shoots and continue sautéing for another 3 minutes or so. If you like your bok choy and bamboo shoots a more crunchy, sauté a little less. If you like them more soft, sauté a little longer.
5. Serve and enjoy!

As I finished the sautéing process, I realized I could have tossed in some red bell pepper for a little extra flavor and color. Also, after tasting it, I wish I had used bacon fat for a more savory element. Next time I make this, I will definitely make those adjustments.

Now, that’s not to say this wasn’t good. It was tasty! The baby bok choy and bamboo were light and a little crispy. Meanwhile, the garlic balanced well with the oh-so-slight sweetness from the coconut oil. It served as a pretty good compliment to our delicious buffalo steaks. But next time, I’m going to try making this side dish a little more savory.

What would you do differently? We would love to hear from you! 🙂